Tuesday, March 20, 2012

Gradient Nails

Lately, I've been trying out a lot of different designs on my nails. It started a couple years ago when I'd given up on getting (and keeping up with) acrylics for the sake of my pocketbook. I love having my nails painted, but I just couldn't justify forking over $30 every two weeks anymore. Add to that the fact that while I was pregnant I barely had the energy to wash my hair, and you end up with poor, bare-nailed me. So I started painting my nails at home, and as the trend started to explode on blogs across the web, I was more than ready to jump on the home manicure train. My hubby found some crackle polish at Target, and I played around with that for several months, changing the base color weekly. But the crackle could only hold my attention for so long, and I soon started diving into the multitudes of tutorials out there.

I plan to start adding in an occasional home manicure post, to show off my burgeoning skill. And by that, I mean I'll put up a picture of my one successful manicure out of ten failed attempts.

I bought some various blue nail polishes for the galaxy nail look a few weeks ago, and it really turned out awesome! Sadly, I can't find the memory card that has the pictures I took on it right now. I'm sure it'll turn up! In the meantime, I decided to do a gradient look, and added some glitter on top. I like it!


The hubby has our camera with him in Texas, so this was taken on my phone. I apologize for the crappy quality. To make this look, I started with the light blue, and painted the whole nail. Once that dried a bit, I blotted on the medium blue with a cut-up make-up round (the kind you get in a bag for like a dollar). The dark blue went on last, and I ended up having to blot over it with the medium blue to get it to blend a little better. I topped it all with the blue glitter, and a final clear coat. I really like how it turned out, and it looks really sparkly in the sun - a rare sight here during the winter.

I hope you like it! I'm still working up the courage to attempt a marble nail. We'll see how many times that fails before I get it right.

Wednesday, February 22, 2012

Nursing Necklace

Since I already posted the link to the tutorial I followed to crochet each bead, I figured I'd post a short blurb to show off the finished product. I added some glass pearls and some moss agate beads to jazz it up a bit. Here's my beauty:


I'm really happy I was able to complete a crochet project for once. Each bead took less than five minutes, so it's not like it was taxing at all, but I'm still proud. It's so pretty! Hope you like it!

Tuesday, February 21, 2012

Creation Frenzy!

I have apparently been busier than a honey badger! It actually surprised me how much I'd gotten done when I gathered all the pictures together. Next post will be a nifty tutorial on how to make deep mattresses make friends with shallow fitted sheets, but this time around all I have is pictures of finished projects. Hope you enjoy them!

I've been [slowly] learning how to crochet, bit by frustrating bit. So, I found this scarf crochet pattern and figured I'd give it a try. It's surprisingly easy, but I think next time I'll use a lighter weight yarn, because you can't really see the detail very well. It's also a little hard to pick out separate stitches. Nevertheless, here is the scarf I've been working on:


I think it's coming along pretty well. Of course, I don't have a lot of patience for continuous crocheting, so though the tutorial says you can knock this out in an evening, it's taking me quite a bit longer.

I've seen a lot of versions of nursing necklaces, such as this one, but I'll be the first to admit I'm a bit cheap. The price listed is quite fair based on the cost of yarn and of course, the cost of the creator's time, so don't think I'm undermining the value of the crafstmanship here. I just thought it looked like a fun project, so I found this tutorial and found that it was very fun and easy. I've only made two so far, but once I make a few more I'll string them up and have something (other than scratching my skin off) to entertain Audrey while she eats.


Continuing the theme of my cheapness, I created my first knock-off jewelry! I saw this lovely necklace at Target, but I couldn't bring myself to pay $34.00 for it. It's only $29.99 online, but I'd still have to contend with shipping.


So I made my own! The beads were about $6.00 and the leather cord was $2.00. Much better for my budget. I like mine better, actually.


These bracelets are really popular right now, and I adore them. So I made one! This tutorial was very helpful.


I posted before about the crib skirt I made for a friend. She liked it so much she asked me to make some curtains for her, so I've been painstakingly working on those. I don't have any pictures yet, but I will once they're finished. In the meantime, I used the excess fabric from the crib skirt to make coordinating pillows for the nursing chair!


Lastly, I am so excited to share our bathroom makeover-in-progress. As long as we've lived together we've had a rubber ducky theme in the master bath. Now that we have a kid, I figured maybe it was time to have a slightly more grown-up theme for our own bathroom. We're keeping the bright, fun, kid-friendly frog theme in the other bathroom.

After a lot of online window shopping and browsing several local stores, we finally found the perfect shower curtain and towels at Bed Bath and Beyond - a place I'm not afraid to say I don't usually like. Their prices are much higher than I'm typically comfortable with, but I just couldn't find the colors I was dreaming of anywhere else. Unsurprisingly, the prices were a bit high, but to be fair I have never felt such a luxuriously soft shower curtain before.

Anyway, here is our bathroom right now. We have more work to do, but I couldn't wait to show it off!


The little ducky hooks aren't staying - I just haven't found hooks that I like yet.


We picked out the flowers and the mini-planter at Michael's, and they magically match the curtain really well. We filled the jars with some rocks my hubby tumbled. I love it!

Well, thanks for looking (and for sticking with me through all these pictures!) Maybe now I can slow down a bit!

Wednesday, February 08, 2012

Journal Upgrade!

I am so in love with my new (old) journal!


First of all, I must certainly give credit where it's due, so this is where I found the idea to dress up my old journal. I love the journaling ideas she has, and adding fabric to a paper journal is just one of them. So here is the original journal, which was given to me by a friend on my eighteenth birthday. We won't talk about how long ago that was. Sorry for not getting a picture of the whole thing; I guess I was too eager to take out the giant spiral binding.


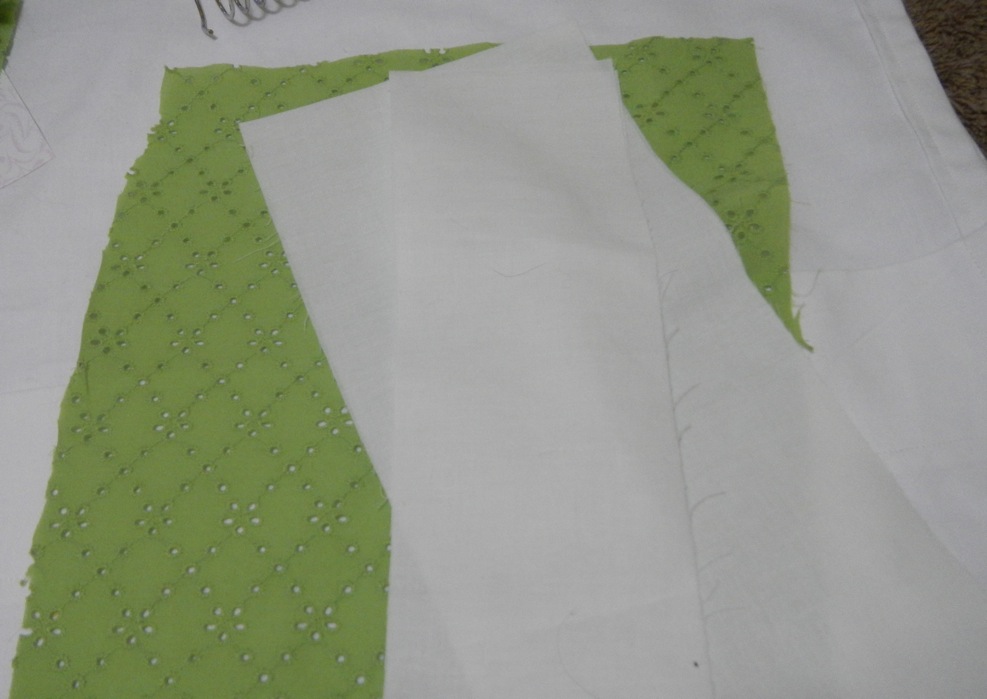
After taking out the spiral, I pulled out some green eyelet fabric that I'd purchased a while ago without a project in mind. I didn't want the colors on the cover to show through, so I grabbed some white fabric scraps too.


Though I knew I was going to do a post about this project, I still haven't quite gotten used to taking a picture of every step of the process. So, I forgot to capture the covering process. Basically, I used a foam brush to paint some decoupage glue onto the cover, then put on the white fabric. I wrapped the edges around to the inside of the cover and glued them down. Once the glue had dried a bit, on went more glue and the green fabric. I wrapped and glued those edges too. Next, I chose some fun scrapbooking paper and glued it to the inside covers to hide the edges of the fabric.


To put the journal back together, I pulled some pink yarn through the binding holes, then tied it off in back. It's much less bulky and I think much prettier than the big spiral.


Here's the inside, with that pretty pink yarn showing. Much more fun than boring metal.


I then sewed up some leftover burlap-style cotton fabric into a clean rectangle. This is before it's finished, but I did hem that last side too. I made sure to measure it against the journal so it wouldn't be too short or overlap.


This fabric was to hide the binding on the outside and give the whole journal a more finished look. Here, I used Aleen's Fabric Fusion to glue it on instead of decoupage glue, because it will give it a better hold.


I was just going to glue on some buttons, but I noticed some scrap fabric from a necklace I'd made previously and decided I liked the idea of a flower. I cut out some circles of the white fabric and the colorful fabric. These don't have to be perfect, and I actually like them better if they're not.


To make the petals, I folded the circle over on itself and dabbed a bit of tacky glue in the folds.


I added a few more petals, gluing them in the center.


Then I glued a cute button in the middle of the flower. Don't mind the glue; it dried clear. I was just impatient to take a picture.


I added another button at the bottom.


And there you have it! A whole new look for an old journal!

Tuesday, January 31, 2012

Buttons!!!

I love buttons.

I mean it. I love buttons. 

I can't get enough of them. Buttons on clothes, buttons on jewelry, buttons on purses, buttons on shoes, buttons as eyes on my sock dolls... I seriously love buttons. I'm always oohing and ahhing over button crafts, but I complete surprisingly few of my own. One problem is the price of fancy buttons. Like everything up here, it's a bit high. And I'm cheap. Plain buttons are more than acceptable to me, but there just isn't a huge selection in the craft stores here. I've seen a place on TV (in Canada, of course) where there are rows upon rows, shelves upon shelves, aisles upon aisles of buttons. Thousands of buttons of all shapes and sizes, all sorted by color. Why can't there be a button cache like that here?!

But I'm not going to complain (much). I do have a large collection of random buttons to pick from, and it serves me well enough until I can find my treasure trove of color-coded button glory.

And believe me, I will find it.

Last night as I battled Audrey to sleep for the fourth time, I went to my Zen place - the place where I create craft projects in my head, where it's impossible to mess up and everything turns out amazing. I spend a lot of time in that place. Anyway, I found myself thinking of all the possibilities in a handful of buttons, and decided I need to have buttons in my hair. I almost got out of bed right then to craft for fear of forgetting this idea. But, as Audrey had finally given in and gone to sleep again, I decided to wait until morning.

Thankfully, I didn't forget. And here it is:


I love it. A lot. I know, there's a lot of love in this post. Deal with it.

Simple, but so fun!


The original headband, all boring and blah.

I didn't take step by step pictures, because, well, come on. I sewed buttons to an elastic headband. I think that's pretty easy to figure out. To be sure the knots in the thread on the back don't come out, I super-glued them. I think I'm about to make about a billion more, and maybe I'll add some fabric flowers and such. I'm already itching to go make more, so...

Monday, January 30, 2012

Yay crafts!

I'm super thrilled to share some recent craft projects I've completed, simply because I finally completed some! These awesome bracelets were easy to do, which is important because I am currently on a time-consuming-project hiatus. At least until Audrey gets older and learns what "Mommy's busy" means.

Here are some bracelets I made following this and this tutorial:


I'm also working on a bordered chevron friendship bracelet with some fun, bright colors. Once I get some more beads, I'll be making one of these bracelets too. I'm in a bracelet frenzy.

In the meantime, I've been working on this:


When I was little, my brother and I each had a string-art picture our grandfather had made for us. I remember staring at them for hours and tracing the strings with my fingers. I always wanted to make my own, but just never got around to it. Finally, with boatloads of bright embroidery floss calling my name, I decided to take a crack at it. Now, I feel like it needs some work. I like how the last two letters turned out more than the first three, and I'm on the fence on the "R", but I'm satisfied with it for a first try.

I wrapped a piece of wood in some burlap-ish fabric and stapled it on the back, then did the obvious parts: hammering and stringing. I just have to figure out how to get the eyeliner dots off now. Also, maybe capital letters would have worked better? Ah well, I still like it.

Those boatloads of embroidery floss I mentioned were actually becoming a storage nightmare. I found this idea, but I don't have any clothespins and really couldn't justify buying some just to store thread (sad face). So, I cut up a flat-rate box and used it! I'm already using chopped up old boxes and cardboard as a bracelet weaving loom, so it came to mind to do this:


Organized and tangle free! Yay!

Earlier today we went out and took a picture in front of a frozen waterfall along the highway south of our house. It's a pretty popular stop on our one and only highway, because it is beautiful in all seasons. Exactly a year ago, my hubby and I took a picture in front of it to display my giant pregnant belly. Today, we brought the product of said belly with us!


It tickles me to see the changes we've been through and to reminisce on my pregnancy. What a great year it's been, too! That's it for now, but I'm already scouring my list for something else quick and fun to do!

Friday, January 27, 2012

Faux Metal Wall Art

After seeing this tutorial, and this organizing idea, I had my husband saving paper towel and toilet paper tubes for a couple months. Then I dove in to both projects. I chose to wrap the toilet paper tubes in old wrapping paper scraps, but as yet have not taken any pictures. Soon.

As for the wall art, I love it! I think they turned out great, for a first try. I may add a couple more, but I only had a small amount of wood on hand to make the frames. Again, soon.


I'm finally getting more time to myself now that Audrey can play by herself for a couple hours at a time, so I've been working on a crib skirt for a friend who's expecting her second daughter in a few months. I really like how it turned out!


This fabric is so pretty but was a pain to work with because it desperately wanted to unravel on the cut edges. I ended up sealing all the edges with Stop Fray by Aleen and it worked like a charm, though it got a bit messy. The center rectangle actually caused me the biggest problem because I am not at all capable of understanding stretchy fabrics, and since I was attaching very un-stretchy fabric to very stretchy fabric, it got interesting. Luckily, I was able to maintain the measurements required and my friend said it fits the crib perfectly. Pics of it on the crib will come soon.

Next, I'll be working on curtains for her nursery window and some pillows out of the leftover fabric for when her baby is older. Makes me want to buy a billion kinds of fabric and spend days sewing. Days.

Recently, my sister-in-law invited me to join Pinterest. I've been avoiding it for a long time because I've heard tell of hours spent pinning and pinning and pinning some more. Though it is chock-full of ideas for crafts, home decor, food, etc., I just knew that I would lose any resemblance of productivity if I ever ventured forth into the land of Pinterest. Turns out, I was right. The past few days, I've been collecting hundreds of ideas for beautiful, fantastic, fun and adorable crafts and sewing projects, but I have spent no time actually doing any crafting. Whoops!

Maybe tomorrow...

Thursday, January 26, 2012

Nursery

I've had these pictures up on Facebook, but I thought it'd be nice to put them here too. We put a lot of time into decorating Audrey's nursery and now, nearly nine months later, she's still not sleeping in it. On the plus side, she slept through the night for the first time in six months last night! Progress?

Anyway, here are just a few things we put together for the nursery that I love:

Organization for her many, many onesies.
A wreath for her door made out of scraps from her unfinished quilt.

My friend made these for my baby shower, so I took them home and hung them above the changing table. Audrey stares at them while I change her every time.

I

These days I've had some more time to do the things I want to do, as Audrey is playing more and more on her own. She's standing with the help of furniture and the other day she even stood on her own for a few seconds! She's been babbling and making all the fun sounds babies make, and has been just astounding us with her developing personality. I have to say, I couldn't imagine spending my days in any other way than with my baby girl.

I can't believe it's already been almost nine months since she was born! And soon she'll be a year old and walking and talking! What a wonderful year and a half it's been.

Friday, December 16, 2011

Crib time!

Tonight sucks. Tonight is the first night of what will likely be a long week. Tonight is the night we start teaching Audrey to sleep in the crib (ugh). She's been in our bed too long - I know, I know, terrible parents - and I need my space. And she needs hers. She's seven and a half months old, and this has been delayed too many times, mostly because I cave. Her crying breaks my freaking heart and I just want so bad to give her what she wants. What she wants is to cram into the big bed with Mommy and Daddy like she has since she was about three weeks old. But what she needs is her own bed in her own room before we delay it too long and find ourselves smooshing into bed with a five-year-old Audrey plus whatever siblings may follow.

Not happening.

So here we are, listening to her cry for fifteen minutes at a time and trying not to cry ourselves.

I wish I had done this before she learned to stand at least, because now when I walk in there she is standing at the edge of her crib staring forlornly at the door, and she starts screaming in earnest when she sees me walk in.

If ever there was a legitimate argument against co-sleeping, this is it.

Tuesday, November 08, 2011

Goals

Back on October 15th, I started using the Lose It! app and website to track my calorie intake. I've always been tired of being overweight, but I had a hard time finding the motivation to do anything about it. When on occasion I did actually become proactive, I never had the willpower to stick to it for long. But recently something changed, and suddenly I just couldn't put up with it anymore. So I set a goal to lose 61 pounds at a rate of two pounds per week. Originally, the app said I would reach my goal by May 17th of next year. After tracking my food for one day I realized I was seriously eating too much and making poor choices with what I ate. It didn't take long to get my intake under control.

Now, I'm paying attention to that little thing called a "serving size" that I've always ignored. The weird part? I don't even mind limiting myself. Before, we would dole out the ice cream and just keep eating until it was gone. I thought for sure this would be my biggest weakness, but it turns out that I am actually satisfied with just a half cup of ice cream. And now it lasts longer. Candies and cakes and cookies aren't nearly as enticing as they were, and I think it's because I'm not cutting them out entirely. That has never worked, anyway. I just make room for them in my calorie budget. If I don't have enough calories left, I do a little extra exercise. The last few weeks I've actually been under budget by a couple hundred calories.

What's more: I don't sit and think about food all day. I wouldn't say I was obsessed before, but I was always thinking about what I could snack on next. I thought I would actually be wrapped up in counting calories, but really it just takes a second and I move on to something else. I don't dwell on food all the time, and I feel safe saying I've finally broken my addiction. It's a weird feeling. I love not worrying about food. I love seeing the numbers on the scale getting lower and lower. I love being able to enjoy snacks and candy without feeling guilty.

Yesterday I got to take down the first butterfly from my goal wall. I have lost ten pounds, and it hasn't even been a month yet. Now, the app says I'll reach my goal by May 8th.


I do have the advantage of breastfeeding right now, but I do intend to start introducing more exercise too. I've been shoveling snow and doing more housework, and as much as I hate exercise I've actually enjoyed it because I know it means I can have an extra cookie later, or that I'll lose another half a pound. I've been keeping the house cleaner, which is another mood booster for me. I do love coming home and relaxing in a clean house.

I've also ordered a Jawbone UP wristband, and though it's backordered right now, when I get it I'm sure it'll help with my weight loss. It tracks your activity during the day and can be set to give you a gentle reminder to get up and do something when you've been stationary for too long. I'm really excited and proud of this lifestyle change, and I can't wait to finally be happy with my body again.